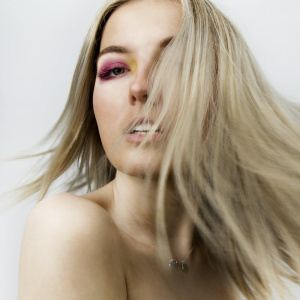
LOVE this make up look! QUICK AND EASY!!!! My face is combination sometimes very oily sometimes very dry around my nose area and its very irritating after I put the concealer my nose area will crack 🥲
To achieve GLOWY look is your SKINCARE prep it’s vvv IMPORTANT! What skincare suits your face. you have to understand your own skin condition.
from my videos that I never use foundation at all only concealer. its quite awhile i never use foundation and i’m happy that i don’t need put so much of products on my face hehe
• Step One: Skin Prep
Toner and serum from Glow recipe. these two products it helps you get that shine; you want the highlighter to look like it's coming from within
moisturizer from Caudalie LOVE LOVE THIS PRODUCT TOO! Last but not least Sunscreen!!! don’t forget your sunscreen after apply all the products.
actually my skincare routine quite simple & easy but works on my face. since I found the best skincare or that suits my face I don’t gets breakout easily.
Step Two: Apply Concealer
I only apply my concealer on my under eye,T-zone, noses area and the redness. THIS IS IMPORTANT, after apply concealer spray the setting spray on you face with concealer after wait for 3 mins then blend the concealer. the concealer that I use is from Hourglass & Nars these two products forever my go to concealer 💯 these two concealers not dry and not very matte at all vvv lightweight. after blend the concealer you can see the glow with your own.
Step Three: Blush and Bronze
I currently only applied liquid and cream products so far, Once you've prepped for your color cosmetics, then you can start pigment application. and mixing all the blush, bronzer, and highlight shades together.
Step Four: Set and Prep with Powder
i’m recommends quickly tapping some setting powder onto the hollows of your cheeks (or anywhere you intend to place blush or bronzer). This will prevent your blush or bronzer from sticking to your cream and liquid products, creating uneven concentrations of color.
Use a finely milled settling powder and a small denser brush,”Then, shake off any access from brush and precisely apply where you need—don’t blend. Wait a few moments and take a clean fluffy brush—like one that's blush size—and sweep away any access from areas of face.
Step Five: Pop On Some Highlight
I uses this step to pinpoint a beam of light, placing the highlighter very strategically on certain parts of the face. Areas to focus on include the peaks of your cheekbones, the bridge of the nose, the Cupid's bow, the inner corners of your eyes.
Step Six: Set Your Look with a Setting Spray
Now that you've completed your look, make sure it lasts by sealing your makeup in with a setting spray. There are many types to choose from, so look for ones that market themselves as “radiant” or “glowing” to keep your lit-from-within shine. For that type of finish, again and again I use my holy grail setting spray from Charlotte Tilbury ✨😚
Hope this helps you ladies!!! i love to share things that what I need to share to y’all heheh